Guide: How To Screenshot on Windows 10 and 11


Different Ways to Screenshot on Windows 10 and 11
- Master keyboard shortcuts to take screenshots quickly and efficiently.
- Utilize the Windows Key + Print Screen shortcut for saving images as PNG files in the Pictures/Screenshots folder.
- Enhance your screenshot experience with features such as scrolling screen captures, customizable hotkeys, and programs like the Snipping Tool, Game Bar, and many more.
SOLVED: How To Take Screenshots on Windows 10 and 11
Using the Print Screen Key
- Full Screen Capture: Press the PrtScn key > Open Paint > Press Ctrl + V > Save it.
- Active Window Capture: Use Alt + PrtScn to capture only the active window. This screenshot is copied to the clipboard and can be pasted into an image editor for further editing.
- Alternative for Computers without PrtScn: Use Fn + Windows logo key + Space bar to capture all active windows.
Using Keyboard Shortcuts
- Windows Key + PrtScn: Automatically saves screenshot in Pictures/Screenshots folder.
- Power + Volume Up (Surface Devices): Captures and saves screenshot in Pictures/Screenshots folder.
Using Snip & Sketch
Snip & Sketch is Microsoft’s tool for capturing screenshots on Windows 10 and 11.
It’s activated by the keyboard shortcut Windows + Shift + S, which brings up a toolbar for various screenshot types, including full-screen, rectangular, freeform, and window grabs.
- Automatic Clipboard Storage: Screenshots are saved to the clipboard immediately after capture.
- Quick Preview Notification: A notification appears in the bottom right corner for a fast screenshot preview, allowing immediate editing, saving, or sharing.
- Multiple Access Methods: Apart from the keyboard shortcut, Snip & Sketch can be accessed through the Start Menu, notification panel, or by searching “Snip & Sketch”.
- Capture Options: Offers four capturing modes to suit different needs. Once a screenshot is taken, it’s stored in the clipboard and can be easily shared or edited.
Using Snipping Tool
Choosing Snipping Mode
- Open the Snipping Tool.
- Click New on the toolbar.
- Select your desired mode: Rectangular, Free-Form, Window, or Full-Screen Snip.
Manual Saving of Snips:
- After taking a snip, the image appears in the Snipping Tool window.
- Go to the File menu.
- Click Save As and choose your desired location and file format.
Using Delay Feature for Timed Screenshots:
- Open the Snipping Tool.
- Click Delay on the toolbar.
- Choose the number of seconds for the delay (from 1 to 5 seconds).
- Click New and wait for the delay timer to complete before the screen capture initiates.
Take Screenshots of Games and Applications
Use the Xbox Game Bar to take screenshots of games and applications in Windows 10 and 11.
Enable Game Bar:
- Open Windows Settings.
- Go to Gaming > Game Bar.
- Turn on the Game Bar switch.
Take Screenshots:
- Press the Windows key + G in a game/app for Game Bar.
- Use Windows key + Alt + PrtScn for a screenshot.
- Or click Screenshot in Game Bar.
Capture Screenshots of Web Pages (Third-party tool)
PicPick is a screenshot tool for Windows 10 and 11 that’s ideal for capturing web pages.
Capture Web Page:
- Press CTRL + ALT + Print Screen with your browser open.
- Or use the Screen Capture option in PicPick’s tray icon.
Scrolling Window Capture:
- In PicPick, select Scrolling Window to capture an entire webpage.
Include Mouse Pointer:
- Go to Program Options.
- Capture tab in PicPick.
- Enable Include cursor image for cursor visibility in screenshots.
Screenshot Full Web Pages and YouTube Videos (Third-party tools)
Web Pages:
- Microsoft Edge: Use the Web Capture feature.
- Chrome: Install the GoFullPage extension.
- Firefox: Utilize its built-in capture functionality.
YouTube Videos:
- Install the Screenshot YouTube plugin for clear snapshots.
Utilizing the Print Screen Key
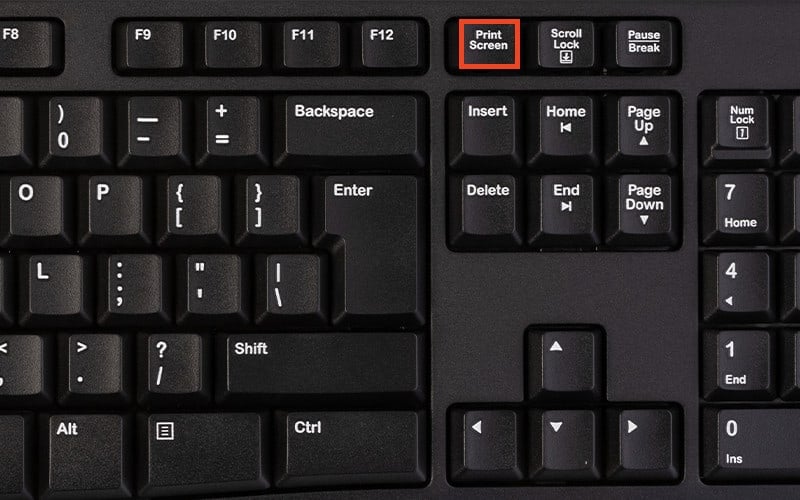
The Print Screen key has been the go-to way to take screenshots since Windows first appeared. Its primary purpose is to snap and copy an entire screen to your clipboard so that you can paste it into a picture editor like Microsoft Paint or take a screenshot that will be automatically saved in the Pictures > Screenshots folder for easy access later.
The Print Screen remains very useful when integrated with additional keys providing more possibilities than initially expected from just one function alone!
If your computer doesn’t have a PrtScn button, you can use this keyboard shortcut to capture all active windows simultaneously: Fn + Windows logo key + Space bar.
Entire Capture Screen

You can easily take a screenshot of the entire screen by simply hitting the Print Screen (PrtScn) button on your keyboard. After pressing this key, it will copy to your clipboard. To paste the image into an image editor like Microsoft Paint, open the application and press Ctrl + V.
To open Paint:
- Click the Start menu.
- Search for Paint and click it to open.
- Press Ctrl + V, which allows you to paste it there.
- Save the screenshot by clicking File > Save.
Active Window Capture

For capturing an active window and not a full screen, Alt + PrtScn is your shortcut. Once pressed, it will automatically save an image of just that specific window into the clipboard, which you can paste into any desired image editor afterward. To paste the image into an image editor like Microsoft Paint, open the application and press Ctrl + V.
This approach ensures that all screenshots are relevant, with only needed content present without additional irrelevant elements. You can then make whatever alterations are necessary through said editing program.
Mastering Keyboard Shortcuts
Keyboard shortcuts are an irreplaceable resource for any user, enabling quick and efficient action without navigating via a mouse or menu. Taking advantage of these commands to screenshot can save you lots of time, making it much more effective.
Along with the classic Print Screen function on Windows 10 and 11, there are several alternate keyboard shortcuts available that improve your experience even further:
- Press Power + Volume Up for Surface devices to take a screenshot.
- Press Windows Key + PrtScn instantly takes a PNG file to the Pictures/Screenshots folder you can find when you open File Explorer.
Windows Key + Print Screen
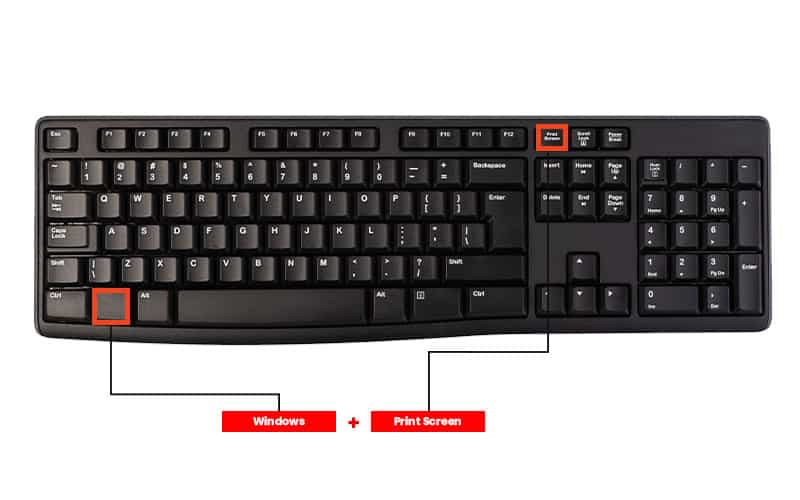
Using the Windows Key + Print Screen shortcut, you can quickly and easily capture full-screen screenshots as image files. This key combination will take a snapshot of your screen, which is then saved in the Pictures or Screenshots folder under “Screenshot (#).png,” with each consecutive screenshot increasing its number accordingly.
This keyboard combo is ideal for anyone who needs to capture many images at once or wants their screenshots automatically preserved as individual files without needing manual editing work, saving time for organization and sharing these captured visuals later on down the line.
Power + Volume Up
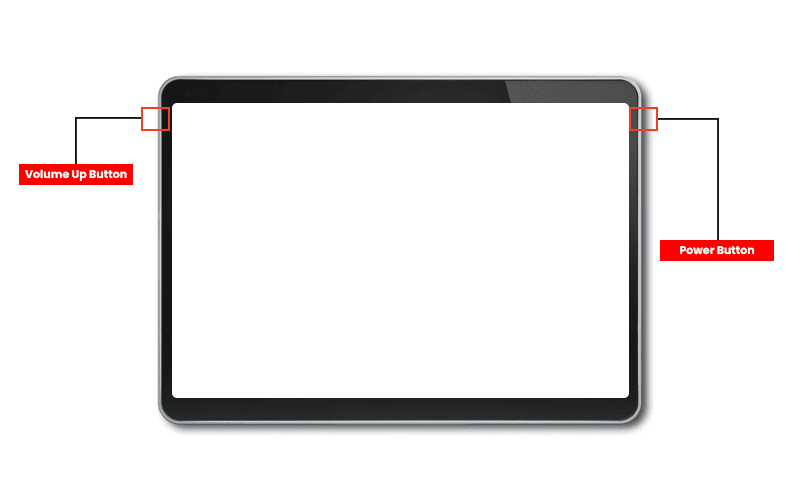
For all Surface users, it is incredibly convenient to take a screenshot with just one key combination:
-
Press the Power button + Volume Up at the same time.
This will promptly capture your full display into an image file saved in Pictures/Screenshots as a PNG format – similar to utilizing Windows Key + PrtScn. With this handy keyboard shortcut, you no longer need the accessibility of a keyboard or trackpad for taking screenshots while out and about or relaxing.
Snip & Sketch
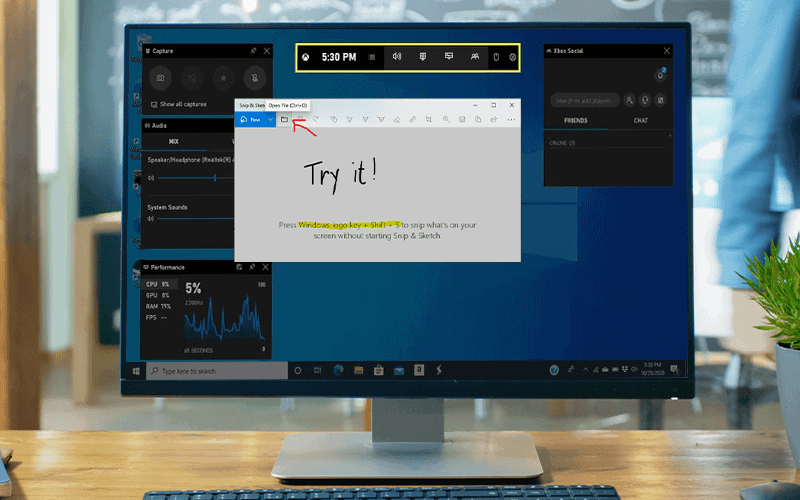
Snip & Sketch, Microsoft’s suggested replacement for the traditional snipping tool on Windows 10 and 11, is a powerful screenshot-capturing program. Pressing the keyboard shortcut of Windows + Shift + S will bring up its user-friendly toolbar. It allows you to take full-screen shots and rectangular or freeform shapes.
Upon taking these screenshots, the following actions occur:
- The screenshots are automatically stored in the clipboard.
- A notification appears at the bottom right corner of your screen, allowing you to preview the screenshot quickly.
- You can then decide how to proceed, such as editing, saving, or sharing it.
Accessing Snip & Sketch
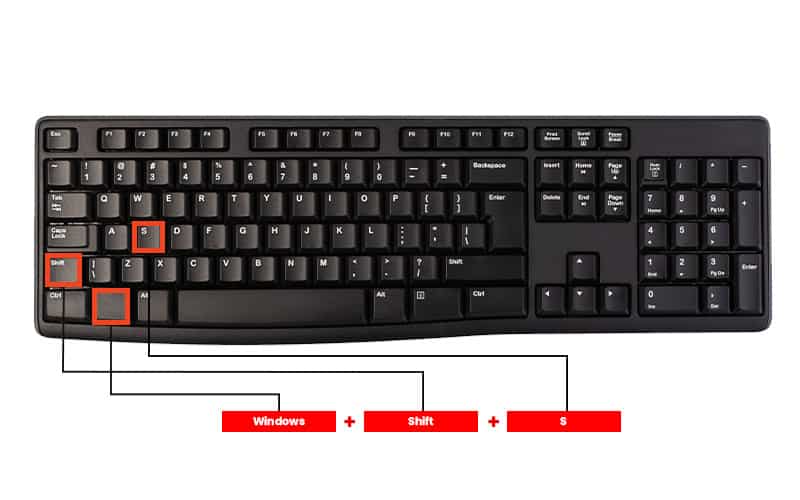
You can easily access the Snip & Sketch tool on Windows 10 or 11 in a few different ways. The most efficient and quickest is using the keyboard shortcut of the Windows logo key + Shift + S, which will immediately bring up the snipping toolbar.
It’s also possible to find it via Start Menu by scrolling down until you see it listed alphabetically. Another way to access Snip & Sketch includes looking at your notification panel. If searching using the search bar, look for “Snip & Sketch” and select from the results displayed accordingly.
No matter what method you choose, taking advantage of this sketching tool with great ease ensures there will always be an opportunity to capture a perfect screenshot available whenever needed.
Capture Options

The Snip & Sketch tool can be accessed by pressing the Windows key + Shift + S, offering four capture options:
- Rectangular snips
- Free-form ones
- Window grabs
- Fullscreen
With it, you will easily get a screenshot of the area of your choice onscreen with just one click or drag away. The capture ends up stored in the clipboard while its preview notification appears right at the bottom-right corner for quick saving or sharing possibilities later on.
Finally, as soon as a desired selection is made from among those provided, hit enter and enjoy editing even complex procedures and documentation needed before forwarding it further.
Snipping Tool
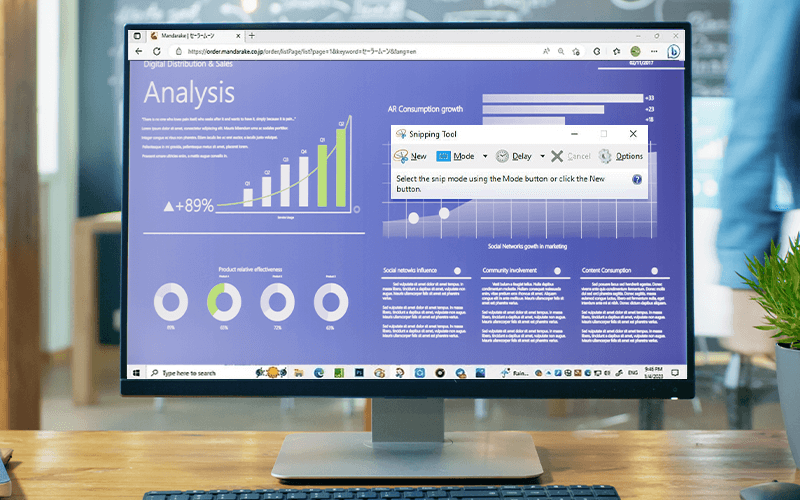
The Snipping Tool is still a useful and flexible tool for taking screenshots in Windows 10 and 11, which is also available on other operating systems like Windows Vista. This built-in program allows you to take multiple types of images and full-screen captures – just like the new version available with Snip & Sketch.
Keep in mind that compared to what’s offered by Snip & Sketch, you’ll have to manually save any snips taken on the Snipping Tool before quitting. This is unlike the former program, where it automatically saves each capture.
Snipping Modes
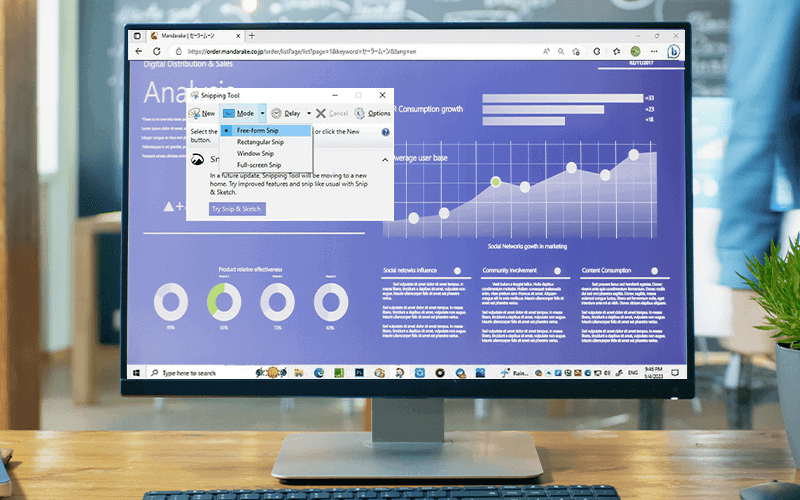
The Windows 11 Snipping Tool can take the ideal screenshot, offering multiple snip modes such as:
- Rectangular snip
- Free-form snip
- Active window snip
- Full-screen snip
To access these methods, open the Snipping Tool before selecting New from the toolbar. The Snipping Tool window will display an array of options ready for when creating screenshots which will appear in a designated folder afterward.
Delayed Capture
A great tool included with the Snipping Tool is its delayed capture option. This feature gives you a timer for screenshots, allowing you to get ready and take the shot at just the right moment. To access this delay selection:
- Simply hit Delay from the toolbar.
- Choose how many seconds should pass before capturing it.
- Click New once set up.
This capability makes taking snaps of very specific events or occurrences much easier as all that needs doing is taking pictures. It is to adjust timing settings beforehand while being able to prepare properly in advance too.
Game Bar: Capture Screenshots in Games and Apps
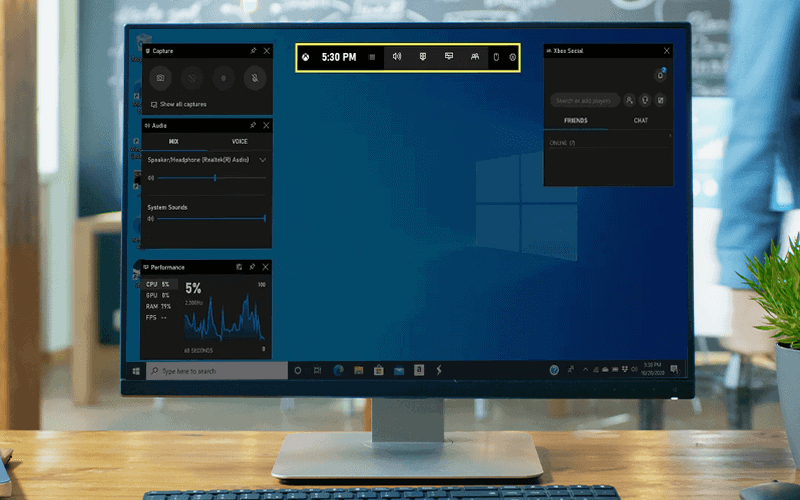
If you’re a gamer, the Game Bar is a must-have feature of Windows 10 that allows for greater customization and provides access to powerful screen capture tools.
Steps to get started with the Game Bar:
- Open up Settings.
- In Settings, navigate to Gaming.
- In the Gaming section, find and toggle on the switch for Game Bar. This enables the usage of key combinations like pressing the Windows logo key + G when an app or game is running.
Capturing screenshots using the Game Bar:
- Users can take advantage of screenshots using either PrtScn+ Alt +Windows key sequences.
- Alternatively, users can select the screenshot capture option directly within the Game Bar.
This makes capturing images easy while opening up plenty of possibilities for sharing the captured screenshots. The Game Bar is a valuable addition to any user’s toolkit, offering convenient and powerful screenshot capture features.
Enabling Game Bar
You can use the Xbox Game Bar to enhance your gaming experience on Windows 10 or 11. This feature provides access to various customization options, recording capabilities, and screenshot tools directly within your games or apps.
- Go to Settings on your Windows device.
- Navigate to the Gaming section in the Settings menu.
- Look for the Game Bar option and toggle the switch to turn it on.
By enabling the Xbox Game Bar option, you gain the ability to customize settings such as game clip recordings, screenshot captures, and broadcasts, all without needing to leave the app you’re currently using. This feature is designed to enhance your gaming experience and makes it easy to share your gaming moments with friends.
Capture Menu
Accessing the Capture Menu in the Game Bar is straightforward. Recording gameplay is made simple so that you’re able to keep track of all those exciting experiences. Just follow these steps:
- Simply press the Windows logo key + G while playing a game or using an app.
- You can also take a screenshot by pressing the Windows key + Alt + PrtScn.
- Or click on Screenshot within the menu to capture your gaming moments with ease and share them without ever needing to exit your current program.
PicPick
For those looking for top-level screenshot capabilities on Windows 10 and 11, PicPick is an ideal choice. Its features–such as customizable hotkeys, scrolling window capturing, and editing tools–make it a comprehensive screenshot tool.
Follow these steps to get started with PicPick for capturing webpages:
- Press CTRL + ALT + Print Screen while having the desired webpage open in your preferred browser.
- Alternatively, access the Screen Capture section from the tray icon in PicPick.
- In the Screen Capture section, choose the Scrolling Window option to capture the entire webpage.
- To ensure mouse pointer visibility in the screenshots, go to Program Options > Capture tab and enable the Include cursor image setting.
With all these options offered by just one utility tool, you can easily create professional-grade images without difficulty or hassle.
PicPick provides comprehensive screenshot capabilities with customizable hotkeys, scrolling window capturing, and editing tools. By following these steps, you can enhance your screenshot experience and create high-quality images effortlessly.
Capturing Full Web Pages and YouTube Videos
Capturing full web pages can be difficult if you don’t have the proper tools. In this section, we’ll explore various solutions that will help capture Microsoft Edge, Chrome, and Firefox webpages as well as YouTube videos accurately – regardless of the purpose for taking them (e.g., documenting an article or preserving a scene).
From extensions to specialized techniques, these strategies guarantee perfect screenshots every time, so you never miss capturing a critical moment in your research again.
Full Web Page Capture
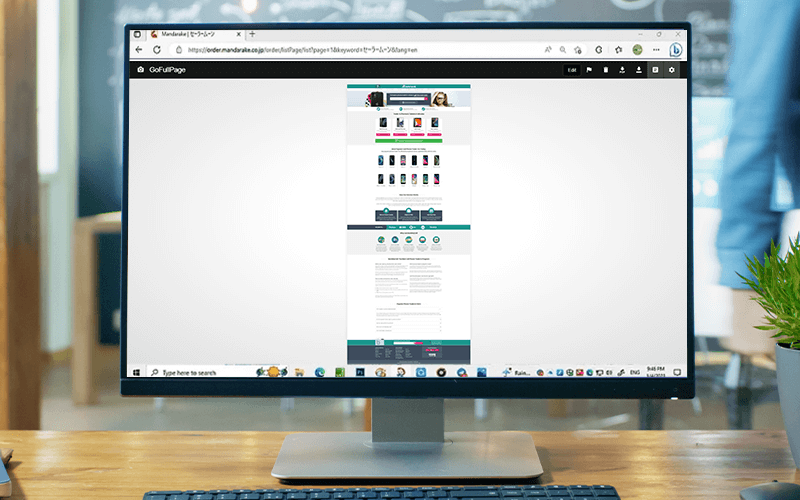
It’s easy to take a screenshot of an entire web page using the tools and extensions created for various browsers. Microsoft Edge offers Web Capture, Chrome has GoFullPage, and Firefox provides built-in functionality.
All allow you to capture total pages with just a few clicks. Capturing these screenshots comes in handy when documenting research, storing articles offline, or capturing complicated webpage layouts, ensuring users are able to save complete records of what they need.
YouTube Video Screenshots

Given the existence of player controls, taking a screenshot from a YouTube video can be quite complex. Fortunately, a simple solution in the form of a browser plugin called ‘Screenshot YouTube‘ is accessible for Windows users.
This extension lets you get clear snapshots without distractions or obstructions. Utilizing it enables one to save memorable moments, record tutorials, and even create custom thumbnails for their own videos on the platform. Altogether, this powerful tool helps easily preserve whatever content you wish while maintaining its original quality.
Including the Pointer in Screenshots
If you’re looking to capture a screenshot that includes the mouse pointer for extra context or clarity, several tools are available:
- Steps Recorder
- ShareXI
- IrfanView
- Greenshot
They all provide the option of including this image in your snapshots. For those needing more features from their capturing software than just adding the cursor graphic – PicPick is an excellent third-party tool with numerous capabilities like editing and sharing options and enabling users to include a representation of their pointer in screenshots taken on Windows devices.
Conclusion
In summary, knowing how to take screenshots on Windows 10 and 11 is valuable for all users. You can utilize the Print Screen key with other keyboard shortcuts or use various built-in tools such as the Snipping Tool, Snip & Sketch, and many more.
You should utilize keyboard shortcuts properly to take good screenshots. Exploring different capture modes is helpful to see which ones best fit your screenshot.
Frequently Asked Questions
How do I take a screenshot on Windows?
To take a screenshot on Windows, you can:
- Use the Windows logo key + PrtScn shortcut to save the image automatically.
- Press PrtScn to capture the entire screen. You can then paste the captured image into an image editing program or even a word processor.
- Pressing Alt + PrtScn will capture the currently selected window. You can then paste the captured image into an image editing program or even a word processor.
For Windows tablets:
- Press the Windows logo button + Volume down button together. Your screenshot will then be saved in the Pictures > Screenshots folder.
What are three ways to take a screenshot on a PC?
Making screenshots on a PC is quite simple. You can easily do it with the following shortcuts:
- Press the Print Screen button on your keyboard to capture the entire screen. Open a Paint document and paste (Ctrl + V) your screenshot to the page before you can save it.
- Press the key combination of Alt + Print Screen to capture a window. Open a Paint document and paste (Ctrl + V) your screenshot to the page before you can save it.
- Press the Windows logo key + PrtScn to immediately save the screenshot of your screen. You may find your files in the File Explorer > Pictures folder > Screenshots folder.
What key is 'screenshot' on Windows?
To take screenshots on Windows, press the Windows logo + Print Screen (PrtScn) keys simultaneously. This will automatically capture an image of the entire screen and save it to your Pictures folder in a Screenshots directory.
Another option is hitting Alt + PrtScn allows you to select what window you want for your screenshot.
How to capture a screenshot on Windows 10?
To take a snapshot of your entire screen on Windows 10, press the Windows key + PrtScn, and it will be saved to the Screenshots folder in Pictures.
Alternatively, you can use the Snip & Sketch tool by pressing the Windows key + Shift + SCtrl + PrtScn or the Snipping Tool, which offers customization options when taking screenshots quickly and easily.
How do I take a screenshot on a PC?
To capture an entire screenshot on a PC:
- Press the Print Screen (PrtScn) button on your keyboard > Open an editing program such as Paint or Photoshop > Press Ctrl + V to paste it in Paint and view your screenshot.
- You can also use Windows+ Prt Scn keys which automatically save the shot taken into the designated Screenshots folder within the Pictures directory.